Weather Activities for Kids
Best Weather Activities for Children and Preschoolers
Weather Activities for Kids:

A variety of seasons brings different emotions in our hearts. And yes, different seasons with lovely weather is always fascinating.
So, it doesn’t matter whether it is the rainy season or spring, every time you need some creative techniques for making your children grasp more.
Yet, some hands-on weather activities are there for enhancing the power of learning for kids. Thus, if you are a parent or a teacher, you should always know some exciting ways of creating a different perspective on them.
Thus, here we have ten mind-blowing weather activities to perform in school or at home.
Table of Contents
- 1 10 Weather Activities for kids
- 1.1 Make a Rainbow
- 1.2 How to Make Rain?
- 1.3 Perform Lightning Experiments
- 1.4 Create a Thunderstorm Front
- 1.5 Create a Weather Journal
- 1.6 Let’s Create Fog in a Jar.
- 1.7 Teach Water Cycle With a Pouch
- 1.8 Blow a Tornado
- 1.9 Wind Weather Activities for Kids
- 1.10 Track All the Weather Factors By a DIY Weather Station
- 2 More Exciting Weather Activities for Preschoolers or Children
10 Weather Activities for kids
Make a Rainbow
How many of you just wonder after a rain to see the VIBGYOR. Yes, we all. We love the scenery of a rainbow after the rain. So, it’s a better idea to make your kid learn about the rainbow through scientific experiments.
Materials: water, glass, a small mirror, sunlight.
Methods or Steps:
- This is an activity for kids to perform on sunny days. That means you need the sun to make a rainbow.
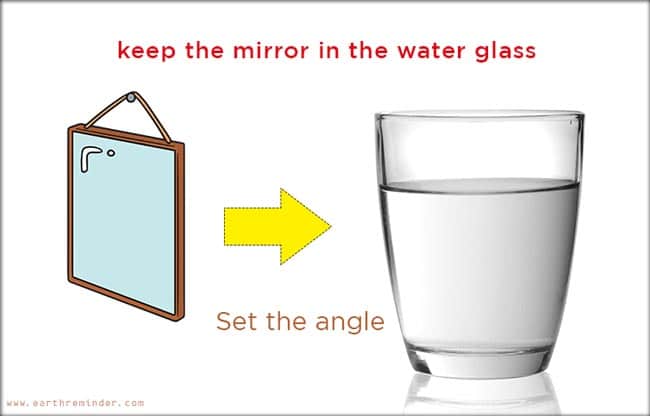
- Fill the glass with water.
- Place a table in a dark room in front of narrow sunshine (you can use a white flashlight as well).
- Now put the water glass on the table in a fashion that sunlight can pass through the water.
- Now, keep the mirror in the water glass on the table.
- Set the angle between mirror and light in order to get a beautiful rainbow on the wall.
What to teach children?
The sunlight is the blend of seven colours we can shortly call them VIBGYOR. Those seven colours are violet, indigo, blue, green, yellow, orange, red. When that white light passes through water, it becomes scattered into that seven colours.
How to Make Rain?
Another exciting activity for teaching your kids about the weather is making rain.
There are several ways to do this at home. But now here we are explaining the shaving foam and glass jar method.
Materials: shaving foam, big transparent glass jar, blue food colour
Methods:
- Fill the jar with water to the mouth.
- Now make artificial clouds by whipping shaving foam.
- Put the blue colour over it.
Clouds are made up of water droplets. When they lose their ability to hold more water, they sprinkle it over the earth as rain. In our experiment, shaving foams act as clouds and food colouring as rain.
Perform Lightning Experiments
Lightning is dangerous; we all teach this to our child. But do they know how lightning forms? Let’s make them learn through this activity.
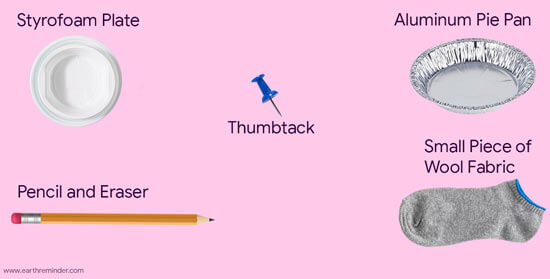
Materials: wool socks, aluminium plate, pin or thumbtack, a pencil with eraser, styrofoam block.
Methods:
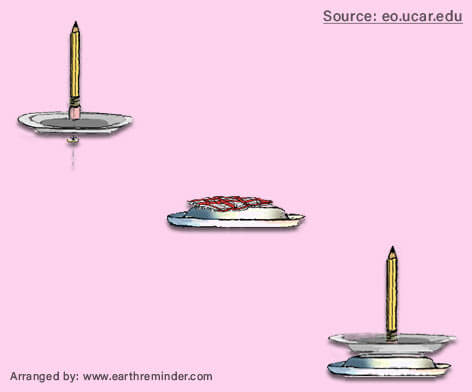
- Place a Styrofoam block (medium-sized) on a table.
- Now, take the aluminium plate and thumbtack and pierce the plate at the centre from the bottom side.
- Then push the rubber of the pencil through the same pin.
- Now, rub the wool with the styrofoam (upside down) block for a 1-2 minutes.
- Place the aluminium plate with a pencil over the upside down block.
- Now, touch the aluminium. You may feel a shock.
- Further, rub against wool until you feel shocked.
- Now make the room dark and touch the plate again for seeing the spark.
- So, this is the lightning you just made.
What to teach children?
Lightning is a type of electricity. When we touch the plate, electrons that are of negative charge attract towards the positive charge of aluminium. Thus, a flash of mini lightning happens. Naturally, clouds contain electrons which after getting attracted to the positive bodies on earth, produces lightning.
Create a Thunderstorm Front
Making a thunderstorm front is one of the fun weather activities to make children learn. So, if you want to make a thunderstorm at home, follow the steps below.
Materials: a transparent plastic jar of shoebox-size, colour pencils, food colour-red and blue, index cards
Methods:
- First, take the blue food colouring with water and fill this in an ice tray for making ice.
- After you get ice, now fill the jar with water of about ⅔ of container volume.
- Wait for 30 sec to 1 minute for the water to sit.
- Now, take blue ice and place it at the end of the jar.
- Further, mix only two-three drops of red colour to the water in the jar.
- Be aware of disturbances and keep the water stagnant.
- Now observe the movement of the colours.
- Draw a diagram of what you observed.
What to teach students?
Before you explain, ask students what they are thinking of its connection with thunderstorms.
Here the red colour represents warm, unstable air mass whereas blue ice cube represents cold air mass. When the warm air rises cold air rushes in to fill the gap. These all happen very fast, and therefore wind blows as fast as 90 miles/hour. The unstable air then forms clouds after being condensed and creates a thunderstorm.
Create a Weather Journal
Funny weather activities to make kids learn about rain, Tornadoes, thunderstorms, snow, wind, clouds and lots more are more exciting through making a weather journal.
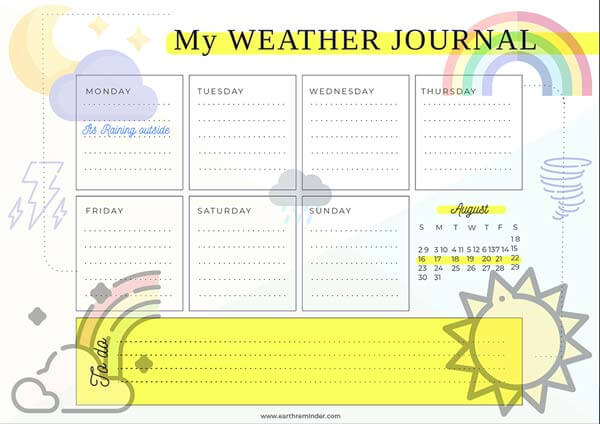
Follow the instructions below to make a beautiful but Knowledgeable weather journal.
Materials: craft papers, construction papers, pencil, crayons, printed labels and pages, scissors, glue, a notebook or journal
Methods:
- Take the notebook or journal.
- Cover it through the construction papers.
- Now think of some creative pages by cutting the colour craft papers, printed labels, and pages.
- Patch them with glue and make beautiful weather themed journals.
- You can teach your kids to draw different shapes related to the weather.
- Also, you can add a lesson every day as a task for your kid.
What to teach them?
Make the little one craft clouds, raindrops, sunshine, tornadoes, and so on. Attach them on several pages and teach them about their facts.
Also add some exercises and math questions in a creative way, so that they will love to solve those.
Let’s Create Fog in a Jar.
Just by taking a single clear plastic or glass jar, you can perform various types of weather experiments.
Well, like rain, thunderstorms, you can also illustrate the picture of fog in your children’s mind. So, let’s do the exercise.
Materials: Black paper, tape, Gallon jar, hot water, plastic ziplock bag, ice cubes and matches.
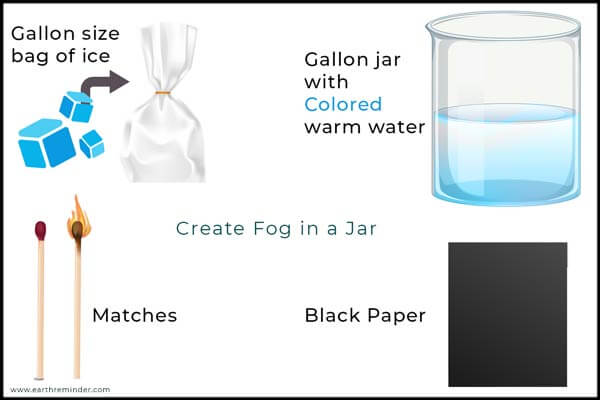
Methods:
- Attach the black paper with tape outside the gallon jar in order to see the process.
- Fill the gallon jar ⅓ with hot water.
- Take the ice cubes and pack them in the plastic bag.
- Now blow or light a match.
- Put the stick inside the water jar and quickly cover the mouth with the ice bag.
- Now observe the fog.
What to teach students?
The matches evaporate some of the water vapours as the sun does. Then the warm air rises up. And when the warm air comes in contact with cold air near ice condensed to form fog or clouds.
Naturally, sun rays heat the surface water, and these evaporate to make the surrounding air masses warm. Then when the season changes from hot days to cold days, those warm air masses collide with cool winter air to form water droplets and become visible as fog.
Teach Water Cycle With a Pouch
Great ideas come with thinking. The best way of teaching your kids the water cycle is through such weather activities. Yes, take a pouch and follow the steps to the best way of teaching.
Materials:
Plastic ziplock bag or pouch, black marker, water, blue food colouring, tape.
Methods:
- Draw a label for the water layer down.
- Fill water up to the label.
- Now make a sun and add food colouring to the water.
- Seal the bag and attach it to the window glass with tape.
- Now make your kid observe the natural evaporation and condensation process.
What to teach children?
Explain how sunlight heated up the earth’s surface. Then water particles move up by air and cool down there to form clouds.
Now explain about different types of clouds. Clouds then sprinkle water or snow as their Precipitation. This is the entire water cycle.
The water present on the surface raises up and again comes down as rain forming a cycle.
Blow a Tornado
Tornadoes are really fascinating and fun for preschoolers, and you can efficiently conduct such weather activities at home. There are several ways to show a tornado. Here is the easiest method you can follow without so many ingredients.
Materials: 2 clear plastic bottles, water, 1-inch metal washer, duct tape, food colouring, liquid soap and glitter.
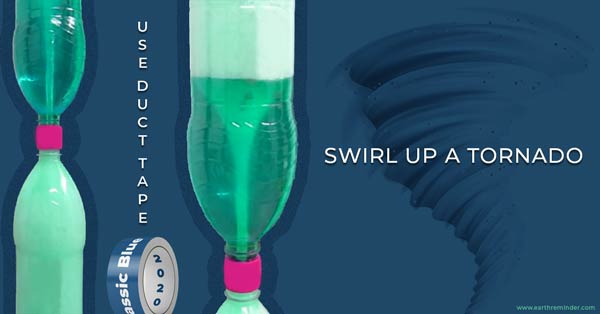
Methods:
- Clean the bottles thoroughly.
- Now remove the plastic at the mouth of the bottles.
- Fill ⅔ water in one bottle.
- Now add some glitters with colour and drop of liquid soap.
- Put the metal washer on the mouth of one bottle and then join the other in an inverted fashion.
- Take assistance and connect both bottles tightly with duct tape to avoid leakage.
- Now turn the bottle and see what’s happening.
What to teach kids?
The water present on the top bottle will move down in a circular or swift motion making a tornado or vortex-like structure. Tornadoes are funnel-shaped, and they are so dangerous.
Thunderstorms usually form Tornadoes. When the surface of the earth is heated by the sun, warm and cold air starts replacing and when a rapidly moving air rolls on it grows in size to form a tornado.
Wind Weather Activities for Kids
Winds are another factor of different kinds of weather. Thus, by performing these weather activities, preschoolers can easily understand what wind is and how they take part in weather changes. Follow the process and make them learn.
Experiment-1:
Materials: balloon, warm water in a bowl, plastic bottle.
Methods:
- Seal the bottle mouth with the balloon.
- Place the empty bottle inside the warm water bowl.
- Now see the wind movement. The balloon will start increasing in size.
Experiment-2:
Materials: Kite and thread
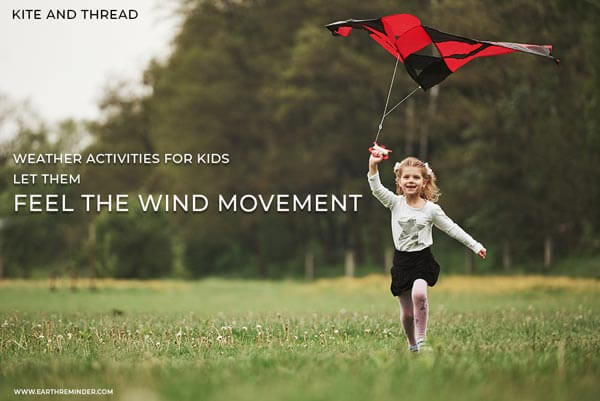
Methods:
- Make or buy a kite with thread.
- Make your kid blow it in the sky to feel the wind movement.
Experiment-3:
Materials: paper pill wills and large recycle bag.
Methods:
- Make or buy paper pill wills.
- Now you can blow them to feel the wind.
- Similarly, take the large recycling bag and make a windsock.
- Now hang it on a high railing, to know the intensity of wind blowing.
What to teach kids?
The wind is the movement of air. When warm air mass is quickly replaced by cold air mass, the wind blows. Though the above said experiments, you can make the kids learn more about the rate and direction of the flow of wind.
Track All the Weather Factors By a DIY Weather Station
If you want another exciting way of teaching your kids regularly, then take part in these weather activities every day. Yes, by making a weather station, you can stimulate the curious mind of a kid. Several well-made weather stations are already available at market, but make your own by following our instruction is the best option. So, let us follow with us to create a trackable weather station.
Experiment-1: Hygrometer
What is this meant for?
For measuring humidity.
Materials: Scissors, a pencil, a cardboard piece or thin plywood, long hairs, white papers, push pins, tape
Methods:
- Make an arrow with a small point in the middle on the white paper. Keep an eye on its size.
- Now cut it out with scissors.
- The point you made in the middle of the starting circle of the arrow is the focus point. Make a hole there.
- Make the hole a bit bigger so that the arrow will move smoothly.
- Now pin the arrow to the cardboard or plywood and check if it is working.
- Now take hair and tape it to the plywood and cardboard so that it will be straight. And it’s done.
How does it work?
Hair has the property of becoming shrunk or expanded like rubber. But rubber’s elasticity is due to mechanical force; however, hair shows flexibility according to its moisture. So when there is more humidity or moisture, the arrow will be downward, and when the air is dry, the indicator will move accordingly. For fun, you can add some graphics with marking normal, dry, and moist.
Experiment-2: Rain Gauge
What is this meant for?
For measuring the amount of rain falling to the earth.
Materials: some pebbles, tape, scissors, marker, a ruler and a plastic bottle.
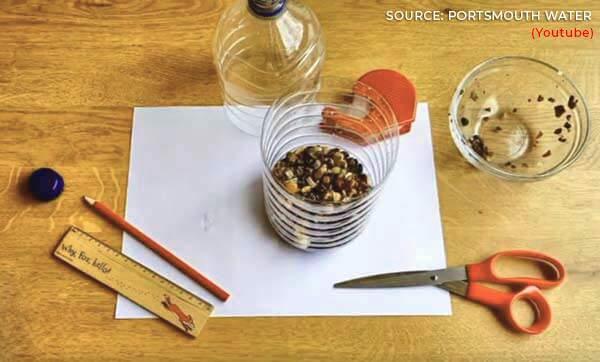
Methods:
- Cut the plastic bottle into two pieces (having the bottom part longer than the upper part) with the scissors.
- Now put the pebbles you collected on the bottom part.
- Invert the upper body and place it in the bottom shape.
- Now make a scale over the bottle by ruler and marker.
- Add some water to the last strip of your scale.
- Place it outside at an open area in rainy seasons or continuous rainy days to measure rain.
How does it work?
The water collected at the bottom of the gauge can easily be measured through the scale. If you enjoy the rain, then put a stopwatch when it starts and end to compare the rate of rainfall.
Experiment-3: Thermometer
What is this meant for?
For measuring indoor and outdoor temperatures.
Materials: Recycled glass jar with a lid, water, red food coloring, rubbing alcohol, clean long straw, measuring cup, cooking oil, modeling clay.
Methods:
- Measure the volume of your glass bottle to be full by the measuring cups.
- Now add the food coloring to equal amounts of water and alcohol.
- Then mix a tablespoon of any cooking oil you have.
- Now make a small hole of straw size on the lid. If you are using a mason jar, it will be more comfortable.
- After that, insert the straw into the hole and cover the jar with that lid and completely seal with the clay.
- And you just made a DIY thermometer.
How does it work?
Put it into the freezer and measure the liquid level in straw. Do the same after keeping it outside. See the difference. Make a record every day.
Alcohol usually responds much to temperature differences. Here you cannot measure the degree but the difference in temperature. You can scale it by the original one.
Experiment-4: Barometer
What is this meant for?
For measuring atmospheric pressure.
Materials: A glass jar, balloon, rubber bands, tube of silicone glue, tape, two clean drinking straws, color cardboard paper, scissors, ruler, and balloon.
Methods:
- Put the glass jar straight.
- Cut the balloon to seal the mouth of the jar.
- Tightly seal the mouth of the glass jar with that cut balloon.
- Secure with rubber bands to avoid air leakage.
- Now cut a small arrow with that cardboard paper. Keep an eye on its size for fitting it to the end of the straw.
- Now insert that arrow to the end of one straw. Make it long by adding the other straw to the previous one.
- Tape the straw over the jar.
- Place the jar with straw to space and make the straw in place by adding glue.
- Make a ruler on the wall.
How does it work?
Air pressure in the jar remains constant always. However, change in weather causes a change in atmospheric pressure as well. So, the balloon causes the straw to move upwards or downwards. The warm day represents a high arrow point, and cold weather shows low.
What to teach?
Everyday instruct your little one to track the weather. Teach him or her some weather facts related to the current day conditions. Also, you can update the weather condition to the journal.
More Exciting Weather Activities for Preschoolers or Children
Besides the above-explained weather experiments, there are several other ways to originate the creativity inside your kids’ minds.
You can make exciting math games with a weather theme. Also, you can play mind-opening word games or do English exercises.
Further, drawing and crafting are the best weather activities to perform at home. There are unlimited ways of improving the imagination and thinking capacity of the little one. Follow those to sow a seed of creativity in children.
Conclusion
So, try these energizing weather activities for your kids and let them know about different types of weather. However, always keep performing the experiments safely and keep an eye on the kids’ safety.
These indoor activities you can smoothly perform at home or school in any season. However, spring is the best time for making the preschoolers understand several weather facts along with their scientific perspective.
Projects or real experimentation are the best way to learn or understand complex scientific reasons in natural ways.